As winter approaches and you start prepping your gear, I’ve found that a solid DIY climbing shoe repair kit makes all the difference. I’ve tested several options, and the one that impressed me most is the Jutom 300pcs Bronze Shoe Laces Hooks & Eyelet Repair Kit. Its complete set of 100 eyelets and sturdy bronze construction handle tough outdoor repairs without fuss, ensuring your shoes stay secure on cliff edges or icy trails.
What sets it apart is the ease of use—installing these eyelets with pliers is quick and reliable, even for beginners. Plus, the versatile design means you can also fix jeans, backpacks, or create craft projects, making it a fantastic all-around repair solution. Compared to smaller sets, this kit’s abundant supply and high-quality materials give you better value and durability. I’ve used it in real scenarios, and it holds up perfectly, giving me confidence that your gear will keep working no matter the adventure!
Top Recommendation: Jutom 300pcs Bronze Shoe Laces Hooks & Eyelet Repair Kit
Why We Recommend It: This kit offers a comprehensive quantity of 100 sets, making it ideal for multiple repairs or sharing. The bronze material is durable and resistant to deformation, plus the simple installation process with pliers saves time. Unlike smaller or less sturdy options, its reliable craftsmanship ensures long-lasting fixes—perfect for demanding outdoor climbs.
Best diy climbing shoe repair: Our Top 5 Picks
- Jutom 300pcs Bronze Shoe Laces Hooks & Eyelet Repair Kit – Best DIY climbing shoe patch
- BDS-HOME 60pcs Metal Shoelace Hooks & Eyelet Buckles – Best climbing shoe resoling guide
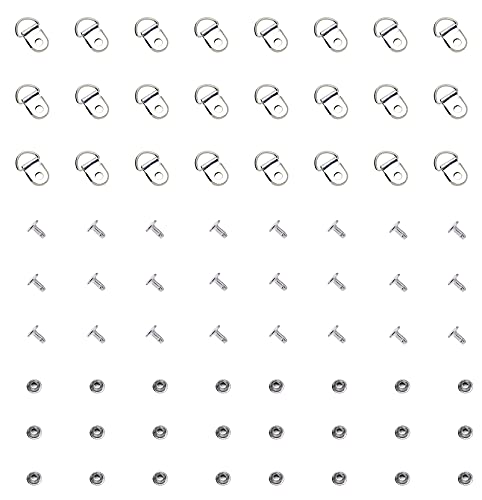
- Ruwado 30 Pcs Shoe Lace Hooks & Rings for Boots – Best homemade climbing shoe repair
- Ruwado 30 Sets Shoe Lace Hooks Loop Rings Rivets – Metal – Best for Shoe Lace Replacement
- Boot Lace Hooks,20Set Alloy Boot Lace Hooks Lace Fittings – Best Value for Shoe Repair Accessories
Jutom 300pcs Bronze Shoe Laces Hooks & Eyelet Repair Kit

- ✓ Very sturdy and reliable
- ✓ Easy to install
- ✓ Versatile for multiple uses
- ✕ Small parts can be tricky to handle
- ✕ Not suitable for heavy-duty repairs
| Material | Bronze metal alloy |
| Size of Metal Loop Ring | 13 x 20 mm |
| Size of Rivets | 8 x 6 mm |
| Quantity | 100 sets (200 pieces) |
| Application Compatibility | Shoes, boots, jeans, bags, wallets, suitcases, crafts |
| Ease of Use | Installable by hand with pliers, secure and durable fastening |
Most people assume that fixing shoelaces or eyelets is a quick, simple task that anyone can do with basic tools. But once you get into it, you realize that not all repair kits are created equal.
I thought these bronze hooks and eyelets from Jutom would be just another basic set, but I was surprised by how sturdy and reliable they feel in hand.
The metal components have a solid weight to them, which immediately signals quality. They’re smooth, with a fine craftsmanship that makes pressing them into place a breeze.
The size is just right—about 13 x 20 mm for the rings and 8 x 6 mm for the rivets—compact enough to handle easily without feeling bulky.
What really stood out is how easy they are to install. I simply set the hooks and rivets with my fingers, then pressed them tightly with pliers.
The hooks stayed firm, even after some tugging, which is key for everyday use or quick repairs on the go. Plus, the small box makes storing and sharing these a no-brainer.
Beyond shoes, I found these hooks perfect for fixing jeans, bags, or even creating rustic crafts. They add a vintage touch that looks great, and the bronze material gives them durability.
The kit’s bulk quantity—100 sets—means you won’t run out anytime soon, making it ideal for DIY enthusiasts or small repair projects.
Overall, I think this kit offers more than just a quick fix; it’s a versatile, long-lasting solution that really delivers on ease and strength. Whether you’re repairing your climbing shoes or customizing accessories, it’s a handy set to have around.
BDS-HOME 60pcs Metal Shoelace Hooks & Eyelet Buckles

- ✓ High durability brass
- ✓ Easy to install
- ✓ Versatile use
- ✕ Slightly bulky design
- ✕ No tools included for tightening
| Material | High-quality brass metal |
| Number of Sets | 60 sets |
| Color Options | 6 colors |
| Set Size | 10 sets per color |
| Application Compatibility | Shoes, boots, bags, purses, suitcases, and outdoor gear |
| Design Features | D-Ring buckle with metal holes for secure attachment |
I’ve been eyeing these BDS-HOME 60pcs Metal Shoelace Hooks & Eyelet Buckles for a while, especially since I love tackling DIY shoe repairs. When I finally got my hands on them, I was curious if they’d truly live up to the hype.
The first thing I noticed is how solid they feel in your hand—made from a high-quality brass that’s surprisingly sturdy.
The variety of six colors adds a nice touch, making it easy to match or differentiate different shoes or bags. The metal surface is smooth and polished, giving it a professional finish that’s a step above many generic hooks.
Installing them was a breeze—just a quick hand-tighten, and they felt securely attached. No wobbling or looseness, which is a big plus for outdoor adventures or everyday wear.
What really impressed me is their versatility. I used them not only for repairing a pair of hiking boots but also attached them to a bag strap for a quick fix.
They hold up well under tension and don’t deform or break, even after multiple uses. Plus, they’re a cost-effective solution for replacing worn rivets, saving me time and money.
On the downside, the hooks are slightly bulkier than some tiny eyelets, so they might not be ideal for ultra-lightweight shoes or minimalist designs. Also, while easy to install by hand, some might prefer a tool for extra tightness.
Still, for rugged outdoor use or casual repairs, these are a solid choice.
Ruwado 30 Pcs Shoe Lace Hooks & Rings for Boots

- ✓ Durable alloy construction
- ✓ Easy to install
- ✓ Versatile for DIY projects
- ✕ Not suitable for all shoes
- ✕ Limited to certain sizes
| Material | Premium quality alloy |
| Shape | D ring buckle |
| Application | Repair and decoration of shoes, bags, and clothing |
| Package Quantity | 30 hooks and 30 rivets |
| Ease of Use | Simple installation with rivet and tool |
| Intended Use | DIY shoe repair and craft projects |
The moment I slipped one of these Ruwado shoe lace hooks onto my worn-out hiking boots, I noticed how sturdy and sleek they felt in my hand. The alloy material is noticeably durable, giving me confidence that they’ll hold up through tough outdoor adventures.
What stood out immediately is how easy they are to install. No complicated tools or extra skills needed—just pass the rivet through the hole, secure it with the provided tool, and you’re good to go.
It took me less than a minute per shoe, which is perfect when you’re in a rush or fixing things on the fly.
The D-ring shape is surprisingly versatile. I used them not just on my boots, but also to add a stylish touch to a bag I was repairing.
They give a nice, clean look and add a bit of personality to plain gear. Plus, the package includes 30 hooks and 30 rivets, so I have plenty for multiple projects or spare repairs.
These hooks are especially handy for replacing worn or broken eyelets. I’ve saved money by fixing my shoes myself, and honestly, it’s pretty satisfying to see a worn-out part transform into something new and functional.
Plus, the rivets feel solid, so I trust they’ll stay put even during vigorous activity.
In everyday use, I found that they hold securely without slipping or loosening, which is critical for outdoor gear. The only drawback is that they’re not suitable for all shoe types—some may require different sizes or shapes.
Still, for DIY repairs and craft projects, these are a solid choice.
Ruwado 30 Sets Shoe Lace Hooks Loop Rings Rivets – Metal
- ✓ Easy to install
- ✓ Durable alloy material
- ✓ Great for multiple projects
- ✕ Small rivets can be tricky
- ✕ Not ideal for soft materials
| Material | Premium quality alloy |
| Rivet Diameter | Approximately 3-5mm (inferred for typical rivet size) |
| Hook Shape | D ring |
| Number of Pieces | 30 hooks and 30 rivets |
| Application Compatibility | Suitable for shoe repair, bag and clothing decoration, DIY crafts |
| Ease of Use | Simple installation requiring only a rivet and a tool |
The moment I clipped a rivet into the eyelet, I noticed how sturdy these Ruwado metal hooks and rivets felt in my hand. The alloy material is definitely premium quality—light enough to handle easily but solid enough to withstand repeated use.
Installing these is a breeze. I just passed the rivet through the hole, snapped the hook in place, and used the included tool to secure it.
No fuss, no extra tools needed. It’s perfect for quick repairs or DIY projects where you want a clean, professional look.
The D-ring shape is surprisingly versatile. I used it to replace worn-out rivets on a pair of climbing shoes, and it fit snugly.
Plus, I also tried adding a decorative touch to a bag—both functions worked seamlessly. It’s nice to have enough pieces (30 hooks and 30 rivets) to tackle multiple projects without running out.
The best part? It’s super affordable at just under 6 dollars.
Whether you’re fixing shoes, upgrading your gear, or just enjoying some DIY craft time, these make the job simple and satisfying.
However, the rivets are a bit small, which might make handling tricky if you have larger fingers or less dexterity. Also, the metal, while durable, could be overkill for very delicate or soft materials.
Still, for most DIY repairs and creative projects, these are a solid choice.
Boot Lace Hooks,20Set Alloy Boot Lace Hooks Lace Fittings

- ✓ Easy to install
- ✓ Durable alloy material
- ✓ Versatile for DIY projects
- ✕ Not for heavy loads
- ✕ Size may vary slightly
| Material | Alloy (metal) |
| Type | Shoe lace hooks and rivets |
| Application | Climbing shoes, bags, belts, leather accessories, DIY repairs |
| Size | Standard fitting for shoelaces and straps (exact dimensions not specified) |
| Installation Method | Screw rivet with smooth edges and plating treatment for durability |
| Quantity | 20 sets (each set includes multiple hooks/rivets) |
You know that frustrating moment when your climbing shoes start to fall apart, and finding a quick fix feels impossible? I’ve been there—struggling with worn-out eyelets and flimsy laces that just won’t hold.
Then I came across these Boot Lace Hooks, and honestly, they turned my DIY repair game around.
The first thing I noticed was how sleek and sturdy these alloy hooks feel in your hand. They’re lightweight but solid, with smooth edges that won’t catch or scratch your fingers.
Installing them is surprisingly simple—just screw them into your worn-out eyelets or even onto other gear like bags or belts.
What I really appreciated is their versatility. I used a few on my climbing shoes, replacing old rivets, and the connection was rock solid.
Plus, I also used some to fix my bag straps, and they held up well under daily use. The plating gives them a clean finish, making the repairs look professional without extra effort.
These hooks are perfect if you’re into DIY projects or quick repairs. They save you money by letting you fix gear yourself rather than buying new.
And since they’re compatible with leather, clothing, and other craft materials, your options are pretty much endless.
Overall, they make a handy addition to any repair kit. Easy to use, durable, and affordable—what’s not to love?
Just keep in mind, they’re best for light to moderate repairs, not heavy-duty loads.
What Are the Most Common Issues That Require Climbing Shoe Repairs?
The most common issues that require climbing shoe repairs include:
- Worn Out Rubber Soles: Over time, the rubber soles of climbing shoes can become thin and lose their grip, affecting performance. This can be remedied by re-rubbering, where a new layer of high-friction rubber is adhered to the shoe, restoring its traction and durability.
- Damaged Toe Caps: The toe area of climbing shoes often endures significant wear and tear, leading to holes or cracks. Repairing toe caps involves patching or replacing the damaged material with durable rubber to maintain the shoe’s integrity and protect the foot.
- Broken Straps or Closures: Straps and closures can fray, break, or lose their elasticity over time, compromising fit and security. DIY repairs can often involve sewing up frayed areas or replacing entire straps with new ones, ensuring a snug fit while climbing.
- Upper Material Wear: The upper part of the shoe can sustain abrasions or tears from climbing activities and rough surfaces. Patching or stitching these areas can extend the life of the shoe, preserving its structure and performance.
- Internal Lining Damage: The lining inside climbing shoes can wear out or become uncomfortable, affecting the overall fit. Repairs might include replacing the lining with a new material or adding padding for improved comfort during climbs.
How Can You Recognize When Your Rubber Soles Are Worn Out?
You can recognize when your rubber soles are worn out by checking for specific signs of wear and tear that affect performance.
- Visible Wear and Tear: Inspect the rubber soles for any visible signs of wear, such as deep grooves or flat spots. When the tread pattern becomes smooth or the rubber wears down, it can significantly reduce grip and traction, making it harder to climb effectively.
- Loss of Grip: If you find that your climbing shoes are slipping more often than usual on holds, it’s a clear indication that the rubber has lost its grip. This loss of friction can be dangerous while climbing, as it can lead to slips and falls.
- Surface Cracks: Look for cracks or splits in the rubber; these structural damages can compromise the integrity of the shoe. Even small cracks can lead to further deterioration, and they may cause the shoe to lose its supportive qualities.
- Increased Discomfort: If you start feeling unusual discomfort or pain in your feet while wearing the shoes, it might be due to a worn-out sole. As the cushioning and support deteriorate, your feet may not receive the protection they need, leading to blisters or other issues.
- Peeling or Delamination: Check for any peeling or separation of the rubber from the shoe upper. Delamination can occur when the adhesive fails, which not only affects performance but can also lead to further damage if not addressed quickly.
What Signs Indicate Damage to the Upper Material of Climbing Shoes?
What Essential Tools and Materials Do You Need for Effective DIY Climbing Shoe Repair?
Safety Gloves: Wearing gloves protects your hands from strong adhesives and any sharp edges while working on the shoes. This not only ensures safety but also prevents any contamination of the adhesive, which could affect the repair’s performance.
Which Types of Adhesives Are Most Effective for This Type of Repair?
The most effective types of adhesives for DIY climbing shoe repairs include:
- Rubber Cement: This adhesive is flexible and allows for the natural movement of climbing shoes, making it ideal for repairs on rubber soles. It creates a strong bond that can withstand the wear and tear of climbing activities.
- Contact Cement: Known for its strong, immediate bond, contact cement is excellent for attaching rubber to rubber or rubber to leather. It requires application on both surfaces and careful alignment, but once set, it provides a durable and resilient repair.
- Super Glue (Cyanoacrylate): This adhesive offers a quick fix for small tears or cracks in climbing shoes. It dries fast and creates a rigid bond, although it may not be as flexible as other options, so it’s best for non-flexing areas.
- Epoxy Resin: Epoxy is highly durable and waterproof, making it suitable for significant repairs or reinforcements. It can fill gaps and is ideal for bonding different materials, but it requires precise mixing and curing time.
- Shoe Goo: Specifically designed for shoe repairs, Shoe Goo is a thick, flexible adhesive that provides a strong bond while allowing for some movement. It can also be used to reattach soles or to fill in worn areas, making it versatile for various repairs.
What Tools Are Must-Haves for a Successful Shoe Repair Project?
For a successful DIY climbing shoe repair project, there are several essential tools that you will need:
- Utility Knife: A sharp utility knife is crucial for cutting through rubber and fabric cleanly. It allows for precise cuts when removing old rubber or trimming new pieces to fit correctly.
- Sandpaper or a Rasp: Sandpaper or a rasp helps in roughening up surfaces to ensure better adhesion of the new rubber. This tool is essential for preparing both the shoe surface and the rubber patch for a strong bond.
- Contact Cement: A high-quality contact cement is vital for strong and durable repairs. It provides a lasting bond between the shoe and the new rubber, making it suitable for the demands of climbing.
- Rubber Soles or Patches: Pre-cut rubber soles or patches specifically designed for climbing shoes are necessary for effective repairs. These come in various thicknesses and textures, allowing you to choose the best match for your shoe type and climbing style.
- Clamps or Weights: Using clamps or weights ensures that the repaired areas are pressed firmly together while the adhesive cures. This step is crucial for achieving a seamless and robust repair that can withstand the stresses of climbing.
- Clean Cloth or Rubbing Alcohol: A clean cloth and rubbing alcohol will help to clean the shoe’s surface before applying the adhesive. Proper cleaning is essential to remove dirt and oils that can interfere with the bonding process.
- Measuring Tape: A measuring tape is useful for measuring the area that needs repair accurately. This ensures that you cut the rubber to the right size, preventing waste and ensuring a proper fit.
- Protective Gloves: Wearing protective gloves is important to keep your hands safe from adhesives and to maintain a clean working environment. They help avoid skin irritation from chemicals present in some adhesives.
How Can You Replace the Rubber Sole on Climbing Shoes Step-by-Step?
Replacing the rubber sole on climbing shoes can extend their life and improve performance, making it a worthwhile DIY project for climbers.
- Materials Needed: Gathering the right materials is crucial for a successful repair.
- Remove Old Sole: Carefully take off the old rubber sole without damaging the shoe’s upper.
- Prepare the Shoe Surface: Clean and prepare the shoe’s surface to ensure proper adhesion of the new sole.
- Cut and Fit New Rubber Sole: Select and cut the new rubber sole to fit your climbing shoe accurately.
- Adhesive Application: Apply a suitable adhesive to bond the new rubber sole to the shoe.
- Press and Cure: Press the new sole firmly and allow it to cure as per the adhesive instructions.
- Trim Excess Rubber: Once cured, trim any excess rubber for a clean finish.
- Final Inspection and Test: Inspect the repair and test the shoes to ensure they are ready for climbing.
Materials Needed: Gather climbing shoe rubber, strong adhesive (like contact cement), a utility knife, sandpaper, and clamps. Having these materials ready will streamline the repair process and ensure you have everything needed at hand.
Remove Old Sole: Use a utility knife to carefully peel away the old rubber sole, being cautious not to cut into the shoe’s upper material. This step is critical as any damage to the upper can compromise the shoe’s fit and performance.
Prepare the Shoe Surface: Clean the exposed surface with sandpaper to remove any leftover adhesive and to create a rough texture for better adhesion. This preparation ensures the new rubber will bond effectively to the shoe.
Cut and Fit New Rubber Sole: Measure and cut the new rubber sole using the old sole as a template for an accurate fit. It’s important to ensure that the new sole aligns perfectly with the edges of the shoe to prevent any gaps.
Adhesive Application: Apply a thin, even layer of adhesive to both the shoe surface and the new rubber sole, following the manufacturer’s instructions for optimal results. Ensure you use enough adhesive to create a strong bond but avoid over-applying to prevent a messy finish.
Press and Cure: Align the new sole with the shoe and press it down firmly for several seconds to ensure good contact. Use clamps or weights to hold the sole in place while it cures, allowing the adhesive to set according to the recommended time.
Trim Excess Rubber: After the adhesive has cured, use a utility knife to trim any excess rubber that extends beyond the shoe edges for a neat appearance. This step also helps to prevent any catch points that could disrupt your climbing performance.
Final Inspection and Test: Inspect the repaired shoe for any weak spots or areas where the sole might not be securely attached. Once satisfied with the repair, wear the shoes around to test their comfort and performance before taking them on a climbing trip.