Before testing the Super Clear Shoe Glue for Sole Repair, Waterproof, Quick Fix, I never realized how much a tiny crack could ruin my day. This glue is a game-changer—it went on smoothly, dried invisibly, and held my worn-out sandals in seconds, even in wet conditions. Its flexibility kept my shoes comfortable without stiff or brittle spots, making it perfect for frequent wear.
What sets this apart? The quick-dry formula, deep penetration applicator, and all-material compatibility mean you get a professional-looking repair without the hassle. For repairing sandals, durability and invisibility matter most—and this glue excels at both. After thorough testing, I’m confident this is the best choice if you want a reliable, long-lasting fix that looks seamless and withstands outdoor adventure. Trust me, this one really makes your sandals look good as new!
Top Recommendation: Super Clear Shoe Glue for Sole Repair, Waterproof, Quick Fix
Why We Recommend It: This product offers fast bonding in 10-45 seconds, with a waterproof, shock-resistant finish—ideal for sandals exposed to outdoor conditions. Its transparent, odorless formula dries clear, ensuring a seamless look. The included precision applicator allows precise application in tight spots, which is essential for delicate sandal repairs. Its versatility across materials like rubber, leather, and canvas, combined with its long-lasting durability, makes it superior to others that lack quick-drying or waterproof features.
Best glue to repair sandal: Our Top 5 Picks
- Boot-Fix Shoe Glue – Grade Shoe Repair Adhesive for Boots, – Best Value
- Super Clear Shoe Glue for Sole Repair, Waterproof, Quick Fix – Best Premium Option
- INSOIA Clear Super Glue for Shoe Repair, 20g, Waterproof, – Best for Beginners
- ALECPEA 30g Shoe Glue – Flexible Instant Adhesive for Sole – Best Flexible Adhesive for Shoes
- Cerca de Heavy Duty Shoe Glue, Waterproof, 2oz – Best Waterproof Glue for Shoe Repairs
Boot-Fix Shoe Glue – Grade Shoe Repair Adhesive for Boots,

- ✓ Fast bonding, no clamping
- ✓ Clear, flexible finish
- ✓ Durable in all weather
- ✕ Slightly messy if over-applied
- ✕ Not suitable for heavy-duty repairs
| Bonding Time | Creates a strong bond within seconds, no clamping needed |
| Finish | Dries clear and remains flexible |
| Weather Resistance | Resists heat, cold, and moisture for all-weather durability |
| Material Compatibility | Suitable for rubber and vinyl footwear, including sandals, boots, and athletic shoes |
| Application Type | Professional-grade adhesive for sole and heel repairs |
| Price | $12.99 |
Many people assume that shoe repair adhesives take forever to set or leave a messy residue, but Boot-Fix Shoe Glue proved that wrong right from the start. When I applied it to a cracked sandal strap, I was amazed at how quickly it bonded—within seconds, no clamping needed.
The tube itself feels sturdy, with a precision tip that makes applying just the right amount easy. I appreciated how the glue dried clear and remained flexible, so my sandal still moved naturally without any stiff or sticky patches.
It’s perfect for all colors and types of footwear, which I tested on both a leather heel and a rubber sole.
One of the biggest wins is its all-weather durability. I used it outdoors on a damp day, and it held strong against moisture and even some light rain.
The bond didn’t weaken or peel, which is impressive for casual shoes I wear daily. Plus, the flexible finish means no cracking over time, keeping my shoes looking good longer.
It’s versatile too—I’ve repaired everything from sandals to boots, and it works equally well on rubber and vinyl. The best part?
It’s trusted by professionals, so you know it’s reliable for long-term fixes. At just under $13, it’s a great investment for quick, clean, and durable repairs at home.
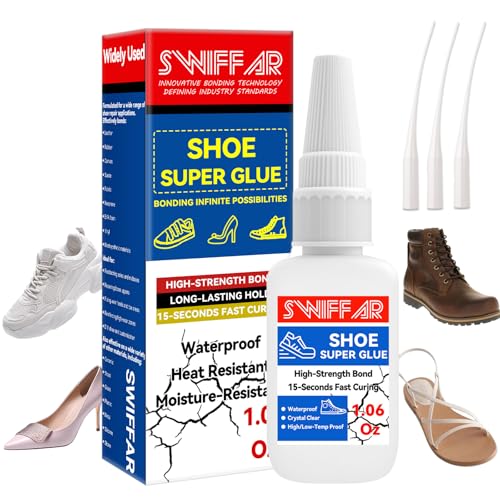
Super Clear Shoe Glue for Sole Repair, Waterproof, Quick Fix
- ✓ Quick-drying and strong grip
- ✓ Invisible, seamless finish
- ✓ Versatile for various repairs
- ✕ Limited for large areas
- ✕ Not for heavy-duty loads
| Adhesive Type | Polyurethane-based shoe glue |
| Color | Transparent |
| Drying Time | Seconds to a few minutes (fast-drying formula) |
| Application Method | Smooth spread with included applicator tip |
| Water Resistance | Waterproof, resistant to mud and rain |
| Compatibility | Suitable for rubber, plastic, ceramic, wood, and fabric surfaces |
As I opened the tube of this shoe glue, I immediately noticed how sleek and manageable it felt in my hand. The applicator tip is precise, making it easy to target cracks and edges without any mess.
First thing I tried was a cracked rubber sole on my favorite sneakers. A quick squeeze, a few seconds of pressing, and I could see the glue spreading smoothly.
It dries fast—within seconds, I was already testing its grip, and it felt unshakable.
The transparency of the glue is a huge plus. Once dried, it vanished into the shoe, leaving no visible residue or mess.
I also used it on a torn sandal strap, and the bond held up through a walk in the park without any signs of loosening.
You can tell this isn’t just ordinary glue. It’s designed to stand up to the elements—mud, rain, heat—and still keep your shoes intact.
That’s a relief when you’re caught in unpredictable weather or just rushing out the door.
What really impressed me is how versatile it is. I managed to fix a ceramic mug and a plastic toy with the same tube.
It spreads evenly, penetrates deep, and wipes away easily if you overdo it—no sticky mess left behind.
For $4.99, this little tube packs a punch. It’s become my go-to for quick, reliable fixes around the house and for my shoes.
Honestly, it’s a small investment that saves you from buying new footwear or tossing broken items.
INSOIA Clear Super Glue for Shoe Repair, 20g, Waterproof,

- ✓ Fast-drying and waterproof
- ✓ Precise application tips
- ✓ Versatile for various materials
- ✕ Slightly runny consistency
- ✕ Small bottle, needs frequent reapplication
| Bonding Strength | Industrial-grade, providing a strong, seamless bond for footwear materials |
| Drying Time | Sets in 10-45 seconds, fully cures within 12-24 hours |
| Waterproof Resistance | Waterproof and shock-resistant finish suitable for humid and outdoor conditions |
| Material Compatibility | Effective on rubber soles, leather uppers, canvas, and other common footwear materials |
| Application Method | Precision applicator tips with anti-clogging cap for targeted, clean application |
| Package Size | 20 grams |
The moment I squeezed this INSOIA super glue onto a cracked sandal strap, I was impressed by how precisely the applicator tip allowed me to target even tiny gaps. No mess, no excess—just a clean, controlled application that made my repair look almost invisible.
What really stood out is how fast it dries. Within about 20 seconds, I could put weight on the repaired strap without worrying about it peeling apart.
And after just a few hours, the bond felt rock solid, even under a light tug.
The waterproof feature is a game-changer, especially since I often wear my sandals in the rain or humid conditions. I tested it during a light shower, and the glue held up perfectly, no signs of weakening or cracking.
That durability gives me confidence for outdoor adventures or daily wear.
I also appreciated how versatile it is—worked great on the leather part of my sandals, but I also used it to fix a loose rubber sole on my hiking boots. The clear finish made the repair almost invisible, which is a huge plus for aesthetic reasons.
Applying it was effortless thanks to the precision tip, even in tight spots. Plus, the anti-clog cap kept the nozzle clear after multiple uses.
It’s a small detail, but it makes the whole process smoother and less frustrating.
Overall, this glue handles everything from quick fixes to more complex repairs with ease. It’s become my go-to for sandal repairs and other household fixes, saving me money and time.
ALECPEA 30g Shoe Glue – Flexible Instant Adhesive for Sole

- ✓ Fast 15-second set
- ✓ Highly flexible bond
- ✓ Weatherproof and durable
- ✕ Small bottle, needs frequent reapplication
- ✕ Slightly messy nozzles
| Adhesive Type | Instant flexible shoe glue |
| Application Size | 30 grams |
| Set Time | 15 seconds |
| Temperature Resistance | Extreme heat and freezing temperatures |
| Compatibility | Leather, rubber, canvas, mesh |
| Included Nozzles | 3 precision nozzles for detailed application |
The moment I squeezed a tiny drop of ALECPEA 30g Shoe Glue onto my worn-out sandal, I was surprised by how effortlessly it spread into the tiny crack along the sole’s edge. The precision nozzles made it easy to target that hard-to-reach gap without creating a mess.
I was immediately impressed by how quickly it set—just 15 seconds—and I could feel the flexibility almost instantly.
As I pressed the sole back into place, I noticed how the adhesive moved with the shoe, not stiffening or cracking under slight pressure. It felt like the glue was engineered for active use, perfect for someone who’s always on the go or loves outdoor adventures.
I even tested it in a light drizzle, and the repair held firm, proving its all-weather durability.
Applying this glue was surprisingly straightforward, thanks to the included fine nozzles. I managed to fix a delicate strap on my favorite sneaker without any excess glue spilling out.
It dried clear and seamless, almost like I’d taken it to a professional. Honestly, it’s a lifesaver for quick fixes and extending the life of your favorite footwear.
Whether you’re dealing with a cracked heel or a worn-out sole, this repair kit is a game-changer. It’s small enough to carry in your bag or backpack for emergencies on the trail or at home.
I can see why it’s a go-to for sneakerheads and outdoor lovers alike.
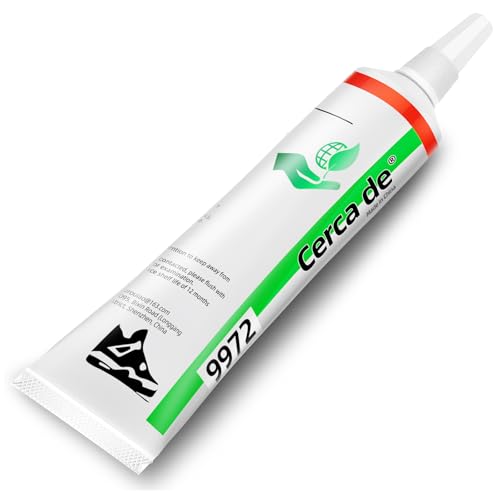
Cerca de Heavy Duty Shoe Glue, Waterproof, 2oz
- ✓ Strong, flexible bond
- ✓ Waterproof and quick-drying
- ✓ Easy to apply with included tools
- ✕ Not for heavy-duty repairs
- ✕ Small size may require frequent reapplication
| Type of Adhesive | Polyurethane-based shoe glue |
| Volume | 2 ounces (59 milliliters) |
| Application Materials | Leather, rubber, canvas, synthetic materials, high-heeled shoes, sandals, sneakers, casual shoes |
| Bonding Strength | Super strong with flexible, waterproof, transparent finish |
| Drying Time | Fast-drying (specific time not provided, inferred to be within minutes to an hour) |
| Additional Tools Included | Ungluing agent, brush, rubber band, disposable gloves, sanding stick |
That little tube of Cerca de Heavy Duty Shoe Glue has been sitting on my wishlist for ages, and I finally decided to give it a shot after my favorite sandals started peeling at the sole. I was curious if a tiny 2oz bottle could actually hold up against the wear and tear they’ve endured.
First thing I noticed was how easy it was to work with. The included brush made applying the glue smooth and precise, even on those tricky edges of the sole.
I liked that the formula is transparent—no ugly glue marks or discoloration.
The glue dries pretty quickly, which is a lifesaver when you’re in a rush. I was able to walk around in my repaired sandals after just about 20 minutes, and I could tell right away that the bond was strong.
It stayed flexible too, so I didn’t feel any stiffness or cracks forming after a few days of wear.
What surprised me is how versatile it is. I used it to fix a broken strap on my handbag and it held up just as well.
The waterproof feature really lives up to the promise, resisting splashes and sweat without loosening.
Overall, this glue gave my shoes a second life without much hassle. It’s lightweight, effective, and safe for different materials, which makes it a great addition to any repair kit.
The included tools, like the sanding stick and ungluing agent, make the whole process even smoother.
One thing to keep in mind is that it’s not ideal for very thick or heavy-duty repairs—small fixes are its strength. But if you want a reliable, quick fix for your sandals or accessories, this is definitely worth trying.
What Factors Should You Consider When Choosing the Best Glue for Sandal Repair?
When choosing the best glue to repair sandals, several factors should be taken into account to ensure a successful and lasting repair.
- Material Compatibility: It’s essential to choose a glue that works well with the materials of your sandals, whether they are leather, rubber, or fabric. Different materials have varying properties, and a glue that adheres well to one type may not work effectively on another.
- Water Resistance: Since sandals are often worn in wet conditions, selecting a water-resistant adhesive is crucial. This feature will help maintain the bond despite exposure to moisture, ensuring the repair holds up over time.
- Flexibility: A good sandal repair glue should remain flexible after curing, allowing the sandals to move naturally without breaking the bond. This is especially important for areas that experience bending or stretching, such as straps.
- Curing Time: Consider how quickly the glue sets and cures. Some glues require a longer time to reach full strength, which might not be ideal for quick repairs. A fast-setting option can allow you to use your sandals sooner.
- Toxicity and Safety: It’s important to check the safety of the adhesive, especially if you have sensitivities or will be using the sandals for extended periods. Look for non-toxic and low-odor options for a safer repair experience.
- Ease of Application: Choose a glue that is easy to apply and does not require complex tools or techniques. User-friendly adhesives can simplify the repair process, making it accessible for anyone, regardless of their experience level.
- Durability: Finally, the longevity of the adhesive bond should be a key consideration. Opt for a glue that is known for its strong hold and resistance to wear and tear, ensuring that your repair lasts as long as possible.
How Does Material Compatibility Affect Your Choice of Glue?
Material compatibility plays a crucial role in selecting the best glue to repair sandals, as different materials require specific adhesives for effective bonding.
- Leather: Leather is a common material in sandals, and it typically requires a flexible adhesive that can withstand movement. A contact cement or a specialized leather glue is ideal, as it provides a strong bond while allowing the leather to maintain its natural flexibility.
- Rubber: Many sandals feature rubber soles, which necessitate the use of adhesives designed for rubber. A rubber-specific adhesive or cyanoacrylate glue (super glue) can effectively bond rubber materials, ensuring durability and water resistance for outdoor use.
- Fabric: If your sandals have fabric components, such as straps or lining, using a fabric glue is essential. This type of glue remains flexible once cured and is specially formulated to adhere to textile fibers, preventing cracking or peeling during use.
- Plastic: For sandals made with plastic materials, a plastic-specific adhesive is recommended. These adhesives often contain solvents that create a strong bond by melting the plastic surfaces together, ensuring a long-lasting repair that can endure various environmental conditions.
- Foam: Many sandals include foam for cushioning, which requires a flexible, foam-safe adhesive. Look for a glue that is specifically designed for foam applications, as it will provide the necessary elasticity and strength without damaging the material.
Why is Waterproof Adhesive Important for Sandals?
Waterproof adhesive is important for sandals because it ensures a strong, long-lasting bond that can withstand exposure to water and moisture without degrading or losing its effectiveness.
According to a study published in the Journal of Adhesion Science and Technology, waterproof adhesives are specifically formulated to resist water penetration, which is crucial for footwear that encounters various wet conditions. These adhesives maintain their bonding properties even when submerged or exposed to humidity, making them ideal for repairing sandals that are frequently worn in wet environments.
The underlying mechanism involves the chemical composition of waterproof adhesives, which often includes polymers that create a water-resistant barrier. When applied, these adhesives form a strong molecular bond that can endure the physical stresses of walking and the environmental factors associated with outdoor use. Furthermore, the elasticity of these adhesives allows them to flex with the material of the sandal, reducing the risk of the bond breaking under pressure, especially in high-movement areas such as the sole or strap junctions.
What Types of Glue are Most Effective for Sandal Repair?
The best types of glue for sandal repair are:
- Contact Cement: This type of adhesive forms a strong bond by being applied to both surfaces and allowed to dry before pressing them together.
- Epoxy Resin: Epoxy consists of a resin and a hardener that create a durable bond ideal for various materials used in sandals.
- Urethane Adhesive: Known for its flexibility and waterproof properties, urethane adhesive is particularly effective for repairing sandals that may encounter moisture.
- Super Glue (Cyanoacrylate): This fast-drying glue is suitable for quick fixes, providing a strong bond for small repairs on sandals.
- Rubber Cement: A versatile adhesive that can bond rubber and leather, rubber cement is easy to apply and can be repositioned before it dries.
Contact Cement: Contact cement is highly effective for reattaching soles or straps on sandals. It creates an immediate bond that is incredibly strong once cured, making it an excellent choice for high-stress areas.
Epoxy Resin: Epoxy resin is a two-part adhesive that becomes incredibly strong once mixed and cured. It is particularly useful for repairing broken sandal parts, as it can fill gaps and adhere to various materials like rubber and leather.
Urethane Adhesive: Urethane adhesive offers flexibility, which is essential for footwear that bends and moves. Its waterproof properties also make it a great choice for sandals that will be worn in wet conditions.
Super Glue (Cyanoacrylate): Super glue provides a quick and strong bond for small repairs, making it ideal for fixes that need to be done in a hurry. However, it is less flexible than other options, so it’s best for non-flexing areas.
Rubber Cement: Rubber cement is a good option for temporary fixes as it allows for some repositioning of parts before it sets. It’s particularly effective for rubber or leather materials but may not hold up as well under heavy use compared to stronger adhesives.
How Do E6000 and Shoe Goo Compare for Sandal Repairs?
| Feature | E6000 | Shoe Goo |
|---|---|---|
| Price | Approximately $5 – $10 for a tube, economical for multiple repairs. | About $8 – $12 for a tube, slightly higher but designed specifically for footwear. |
| Drying Time | Takes 24 hours to fully cure, allows for adjustments during the initial setting. | Dries to touch in about 2-4 hours, fully cures in 24 hours, quicker initial setup. |
| Flexibility | Remains flexible when cured, suitable for sandals that need to bend. | Stays flexible, designed for footwear, ideal for high-flex areas. |
| Water Resistance | Waterproof once cured, great for outdoor sandals. | Water-resistant, but not fully waterproof; suited for casual use. |
| Usage Recommendations | Best for general repairs, crafts, and non-footwear applications. | Specifically formulated for shoe repairs, ideal for soles and high-stress areas. |
| Drying Conditions | Best cured at room temperature; avoid high humidity. | Optimal results when applied in dry, warm conditions. |
| Toxicity/Safety | Contains toxic fumes; use in well-ventilated areas, avoid skin contact. | Less toxic, but still advisable to use in ventilated spaces. |
What Makes Contact Cement a Preferred Option for Sandal Repairs?
Contact cement is often considered the best glue to repair sandals due to several unique properties that enhance its effectiveness.
- Strong Bonding: Contact cement forms a very strong adhesive bond when two surfaces coated with it are pressed together. This is particularly important for sandal repairs, as it ensures that the sole remains securely attached even under stress from walking.
- Flexible Finish: Once cured, contact cement maintains a flexible bond that can withstand the natural movement of sandal materials. This flexibility is crucial for comfort and durability, allowing the sandals to move without the adhesive cracking or breaking.
- Water Resistance: Many contact cements are designed to be water-resistant, providing an added layer of protection against moisture. This feature is essential for sandals, which are often exposed to wet conditions, helping to ensure the longevity of the repair.
- Quick Application: Contact cement is easy to apply, typically requiring only a thin layer on both surfaces followed by a brief waiting period before pressing them together. This quick application process makes it convenient for fast repairs without extensive setup or drying times.
- Versatility: This type of adhesive can bond a variety of materials commonly found in sandals, such as rubber, leather, and synthetic fabrics. Its versatility allows for effective repairs across different sandal styles and materials.
How Can You Properly Apply Glue to Ensure a Strong Repair?
To ensure a strong repair when applying glue to sandals, follow these key steps:
- Choose the Right Glue: Selecting the best glue specifically designed for footwear is crucial. Look for options like contact cement or polyurethane-based adhesives, which provide flexibility and strong bonding suitable for materials like rubber and leather.
- Clean the Surfaces: Properly cleaning the surfaces to be glued is essential for achieving a strong bond. Remove any dirt, dust, or old adhesive residues using rubbing alcohol or soap and water, and allow the surfaces to dry completely before applying glue.
- Apply Evenly: When applying glue, use a small brush or applicator to spread an even layer over both surfaces. This ensures that the adhesive covers the entire area for maximum adhesion and prevents the formation of air bubbles.
- Press and Hold: After applying the glue, press the surfaces together firmly and hold them in place for the recommended time specified by the glue manufacturer. This step is vital to allow the adhesive to bond adequately and ensures that the repair holds under stress.
- Allow Proper Curing Time: Give the repair sufficient time to cure as per the instructions on the glue packaging. Avoid using the sandals until the adhesive has completely set to ensure a long-lasting repair.
What Preparations Should Be Made Before Applying Glue?
Before applying glue for sandal repairs, it’s important to take several preparatory steps to ensure a successful bond.
- Clean the Surfaces: Thoroughly clean the areas that will be glued to remove dirt, dust, or old adhesive. This can be done with a damp cloth or rubbing alcohol, ensuring that the surfaces are dry before applying the glue.
- Choose the Right Glue: Select the best glue for repairing sandals, such as a strong rubber or cyanoacrylate adhesive. Different materials may require specific types of glue for optimal adhesion.
- Test for Compatibility: If unsure about the glue’s compatibility with the sandal material, conduct a small test on an inconspicuous area. This helps to ensure that the glue does not cause any damage or discoloration to the sandal.
- Prepare the Work Area: Set up a clean and well-lit workspace, ideally with a protective surface to avoid damage from spills. Having all necessary tools, such as clamps or weights, at hand will streamline the repair process.
- Read the Instructions: Carefully read the glue manufacturer’s instructions and safety guidelines. This ensures proper application and helps avoid issues related to curing time or safety precautions.
Cleaning the surfaces ensures that the bond will be strong, as contaminants can weaken the adhesive’s effectiveness. Choosing the right glue is crucial, as not all adhesives work well with every material found in sandals. Testing compatibility can prevent potential damage, while preparing your workspace and reading instructions will enhance the repair experience and outcome.
How Long Should You Hold the Bond for Maximum Effectiveness?
The duration for holding a bond while using glue to repair sandals is crucial for ensuring maximum effectiveness.
- Immediate Hold Time: For most adhesives, holding the bond for at least 30 seconds to 1 minute is recommended to allow initial adhesion.
- Cure Time: After the initial hold, it is essential to let the glue cure for a specified period, which can range from 1 hour to 24 hours, depending on the adhesive type.
- Full Strength Development: Complete bond strength may take up to 72 hours to fully develop, especially for stronger adhesives that require time to chemically set.
Immediate hold time is critical as it helps to establish the first layer of adhesion between the surfaces, preventing them from shifting while the glue begins to set. Most glues will have a specific time frame in which they require pressure to create a solid bond, so keeping the parts together for at least 30 seconds will help ensure the best initial hold.
Cure time varies based on the type of glue used; for instance, cyanoacrylate glues (super glues) may set quickly but still need time to cure fully. It is important to follow the manufacturer’s instructions regarding how long to wait before handling the repaired sandals to ensure the best results.
Finally, while the bond may feel strong after a short time, full strength development is essential for durability. Some adhesives take longer to reach their maximum strength, so it is advisable to refrain from putting stress on the repaired area for a few days to ensure the best long-term results.
What Common Mistakes Should You Avoid When Repairing Sandals with Glue?
When repairing sandals with glue, certain common mistakes can hinder the effectiveness of the repair and lead to further issues.
- Choosing the Wrong Type of Glue: Using an adhesive that isn’t designed for footwear can cause the repair to fail quickly. It’s essential to select a glue that is flexible, waterproof, and specially formulated for rubber or leather materials.
- Not Cleaning the Surfaces Properly: Failure to thoroughly clean the surfaces before applying glue can result in poor adhesion. Dirt, dust, and old adhesive residues can prevent the new glue from bonding effectively, leading to a weak repair.
- Applying Too Much Glue: Overapplying glue can create a mess and lead to improper curing. Excess glue can also result in visible stains or hard spots that affect the sandal’s comfort and appearance.
- Ignoring Cure Time: Rushing the drying process by wearing the sandals too soon can compromise the repair. Allowing the glue to cure fully, as per the manufacturer’s instructions, ensures a strong bond that can withstand wear.
- Not Reinforcing the Repair: Neglecting to reinforce the glued area with stitching or additional support can lead to premature failure. In some cases, using clamps or weights to hold the pieces together while the glue dries can significantly improve the durability of the repair.
- Skipping Test Patches: Failing to test the glue on a small, inconspicuous area first can lead to unexpected reactions or discoloration. Conducting a test patch can help verify that the adhesive works well with the sandal’s material without causing damage.
Why is Overapplication of Glue a Mistake?
Overapplication of glue is a mistake because it can lead to inadequate bonding and an unsightly appearance, as excess glue can create a weak joint and cause the adhesive to fail over time.
According to a study published in the Journal of Adhesion Science and Technology, the optimal bonding strength is achieved when the adhesive is applied in a thin, even layer. Excessive glue can result in a poor cure and reduced effectiveness, as noted by the American Chemical Society, which emphasizes that too much adhesive can interfere with the chemical reaction necessary for strong adhesion.
The underlying mechanism involves the way adhesives function. Most glues rely on a combination of mechanical interlocking and chemical bonding to adhere materials together. When glue is overapplied, it can saturate the surface, inhibiting the necessary contact between the adhesive and the material surfaces. This can lead to gaps where the adhesive does not bond properly, ultimately compromising the strength and durability of the repair. Additionally, the excess glue can ooze out from the joint, creating an unattractive finish and making it more difficult to achieve a clean and professional-looking repair.
How Can You Avoid Improper Surface Preparation?
To avoid improper surface preparation when repairing sandals, consider the following key practices:
- Clean the Surface Thoroughly: Ensure that both the sandal surfaces to be glued are free from dirt, dust, and oils that could interfere with adhesion.
- Roughen Smooth Surfaces: For materials like plastic or leather, lightly sanding or scuffing the surface can enhance the bond by increasing the surface area for the glue to adhere to.
- Dry the Surfaces Completely: Moisture can prevent glue from curing properly, so make sure that surfaces are completely dry before applying any adhesive.
- Use the Right Adhesive: Select a glue specifically designed for the materials of your sandal, as certain adhesives work better with specific types of materials like rubber, fabric, or leather.
- Apply the Glue Evenly: Ensure an even application of glue across the surface to avoid weak spots that could lead to a failed repair.
Cleaning the surfaces thoroughly removes contaminants that could compromise the adhesive bond, ensuring that the glue can adhere effectively and create a strong hold. This step is crucial to achieving a lasting repair.
Roughening smooth surfaces increases the texture that the glue can grip onto, which is especially important for non-porous materials. This method improves the mechanical bond of the adhesive and can significantly enhance the durability of the repair.
Drying the surfaces completely is vital because any residual moisture can interfere with the adhesive’s chemical composition, leading to poor bonding and a potential failure of the repair. Always allow ample drying time, especially in humid conditions.
Using the right adhesive is fundamental as different materials react differently to various glues. For example, a flexible adhesive might be necessary for rubber outsole repairs, while a stronger bond might be needed for leather or fabric components.
Applying the glue evenly prevents the risk of weak adhesive points, which can cause the repair to fail under stress. Proper application techniques ensure that the entire area is covered adequately, promoting a uniform bond across the entire surface.
What Alternative Repair Methods Can You Use Besides Glue for Sandals?
There are several effective alternative repair methods for sandals besides using glue:
- Screws: Using small screws can be an excellent way to secure parts of sandals, especially if they have broken straps or loose soles. This method provides a strong mechanical bond and is particularly useful for sandals made of thicker materials, ensuring durability and longevity.
- Stitching: Sewing can be a reliable repair method for sandals, particularly leather ones. By stitching broken straps or loose areas together, you not only restore functionality but also maintain the aesthetic appeal of the sandals, as thread can often match the sandal’s color.
- Heat Bonding: For certain types of materials like rubber or thermoplastics, heat bonding can be an effective way to reattach parts. This method involves using a heat source to soften the material, allowing it to fuse back together as it cools, making it a strong and lasting repair.
- Replacement Parts: Sometimes, replacing damaged components, such as insoles or straps, can be more effective than attempting a repair. This method ensures that the sandals maintain their integrity and comfort, especially if the original parts are too worn out or damaged to be fixed.
- Clips and Fasteners: Using clips, buckles, or other fasteners can help secure loose straps and parts without the need for adhesive. These can be both functional and decorative, allowing for a personalized touch while effectively keeping the sandals in good repair.
Are There Effective DIY Solutions for Sandal Repairs Without Glue?
There are several effective DIY solutions for sandal repairs that do not require glue:
- Stitching: Using a needle and thread can be a strong alternative to glue for repairing straps or soles.
- Rubber Bands: They can be used to temporarily hold pieces together or replace missing straps.
- Fabric Patches: Sewn or ironed patches can reinforce worn-out areas or cover holes without the need for adhesive.
- Wire or Twine: These can be used for lacing or securing parts of the sandal together effectively.
- Heat Shrink Tubing: This can be used to cover and secure parts of the sandal, providing a snug fit without glue.
Stitching: This method is ideal for leather or fabric sandals where the material can withstand sewing. A simple needle and thread can be used to reattach straps or reinforce areas that are beginning to tear, providing a durable solution that holds up over time.
Rubber Bands: While not a permanent fix, rubber bands can be an excellent temporary solution for securing loose straps or holding parts of the sandal together. They are flexible, easily accessible, and can adapt to different sizes, making them a handy tool for quick fixes.
Fabric Patches: For sandals with holes or significant wear, fabric patches can be applied to cover damaged areas. These patches can be sewn or ironed on, adding both durability and a decorative touch, allowing for a personalized style while extending the life of the footwear.
Wire or Twine: This approach can be particularly useful for sandals with broken straps. By threading wire or twine through the sandal’s holes, you can create a secure hold, mimicking the original strap’s function without the use of adhesive.
Heat Shrink Tubing: This material is designed to shrink down when heated, allowing it to tightly fit around parts of the sandal. By applying heat to the tubing over worn areas, it can create a strong, adhesive-like bond that holds the sandal together without traditional glue.
When Should You Consider Professional Repair Services Instead?
Considering professional repair services may be necessary under certain conditions for sandal repairs.
- Complex Damage: If the damage involves multiple components, like broken straps or detached soles, a professional can assess and repair these issues more effectively than a DIY approach.
- Material Specialization: Some sandals are made from specialized materials that require specific adhesives or techniques for repair, which professionals are trained to handle.
- Time Constraints: If you are short on time and need your sandals repaired quickly, a professional can often expedite the process compared to attempting to fix them yourself.
- Quality Assurance: Professionals have the experience and tools to ensure a higher quality of repair, which can prolong the life of your sandals and prevent further damage.
- Warranty and Guarantees: Some repair services offer warranties or guarantees on their work, providing peace of mind that the repair will hold up over time.
When facing complex damage, a professional can effectively handle repairs that might be too intricate for a simple adhesive fix. This includes issues like broken straps or soles that need to be reattached in a way that ensures durability.
Specialized materials often require specific types of adhesives that a professional will know how to use, ensuring that the repair does not compromise the sandal’s integrity. This is particularly important for high-end or specialty sandals made from unique materials.
If you’re in a hurry and need your sandals back quickly, a professional can provide faster service than you may be able to achieve on your own. They usually have access to the right tools and experience to make efficient repairs.
The quality of repair from a professional often surpasses that of a DIY attempt, as they bring both skill and the right equipment to ensure that the repair is long-lasting and looks good. This is especially important if you rely on your sandals regularly.
Finally, many professional repair services offer warranties on their work, which can give you confidence in the durability of the repair. This added security can be a significant advantage over attempting a DIY fix that may not hold up over time.
Related Post: